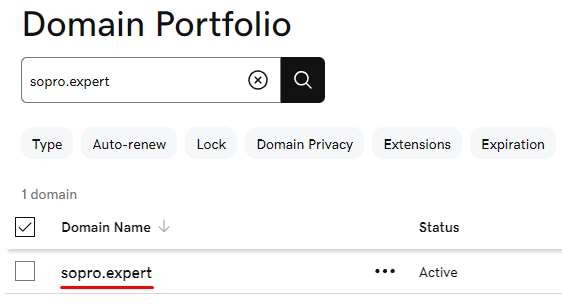
Subdomain – Sopro technical setup
Introduction
To configure a subdomain which can be connected to the Sopro activity you can refer to the options below:
- Configuration enabled by adding NS Records
- Configuration enabled by updating DNS Records
Should you require any support during this set up process please contact your Sopro CSM
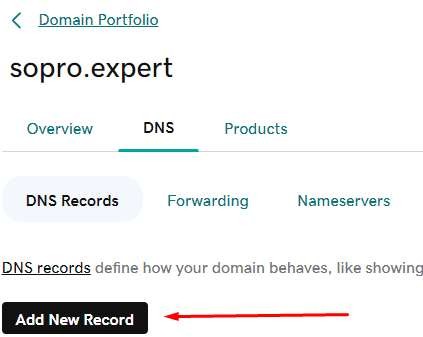
Section 1: NS records addition
Adding NS records to your subdomain enables Sopro to gain control over the selected subdomain. This means once the NS records are added, all additional DNS records under the agreed subdomain will be added by Sopro.
To start the configuration, Sopro requires the name of the subdomain in order to generate the NS records required for the authentication.
Examples of most common used subdomains:
email.domain.com / mail.domain.com; uk/eu/us.domain.com
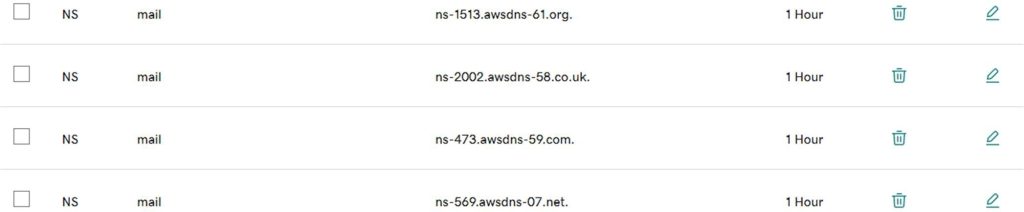
Once a subdomain name is selected and shared with Sopro, 4 NS records are generated and are provided by Sopro via e-mail, which then would need to be added in your DNS Manager, and Sopro can start configuring the additional setup to connect the subdomain with your Sopro campaign.
On the next page we’ll showcase examples of NS records updated in different domain registrar/DNS Managers.
NS record examples
GoDaddy
- Log into your GoDaddy account and navigate to:
- Your Account -> My Products -> Domain Manager
- You can also follow this link: https://dcc.godaddy.com/
- Find your domain in the list (use the search bar if you own multiple domains) and click on the domain name itself:
- Choose the DNS tab and click on “Add New Record” to add your first record:

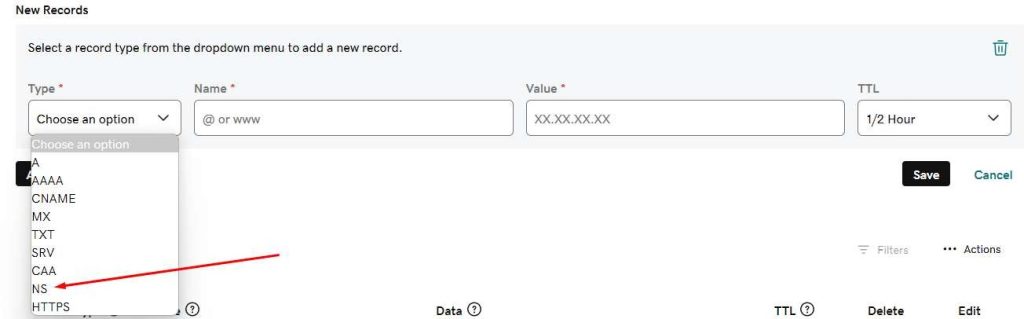
- Next select the relevant information from the drop down.
Type – choose NS from the dropdown menu.
Name – insert the subdomain name which has been agreed upon (i.e mail.domain.com)
Value – insert the nameserver records sent by Sopro.
When finished click the “Save” button to save the new record:
- To complete the setup, repeat the process above to update all 4 NS records sent by Sopro.
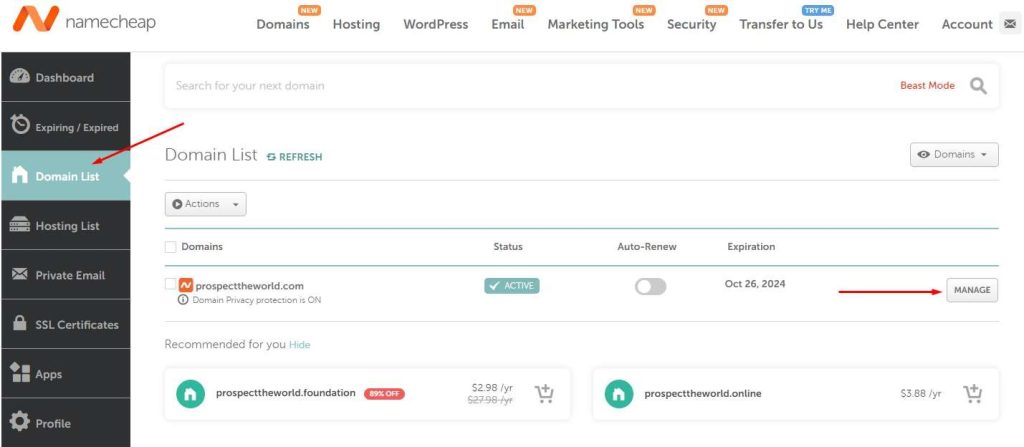
Namecheap
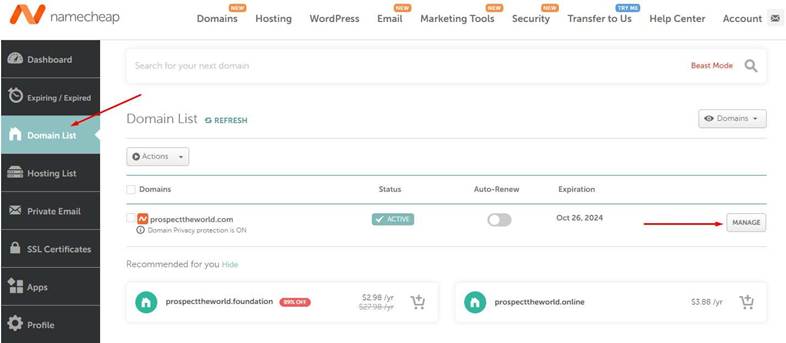
- Log into your Namecheap account and click on “Domain List” on the left-hand side. Find your domain in the list (use the search bar if you own multiple domains), and click the “Manage” button:
- Click on “Advanced DNS”:

- Scroll down and under all your DNS records find the “Add new record” button:

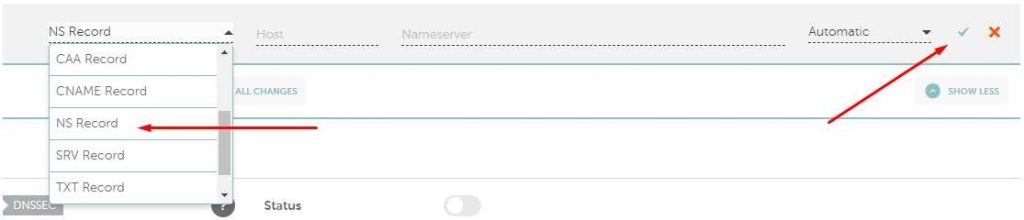
- Choose “NS Record”. Fill the “Host” field with the subdomain name agreed upon and Nameserver with one of the 4 nameserver records sent by Sopro. Tick the green check symbol to save the new record:
- Add all 4 records sent by Sopro by repeating the previous 2 steps:

Cloudflare
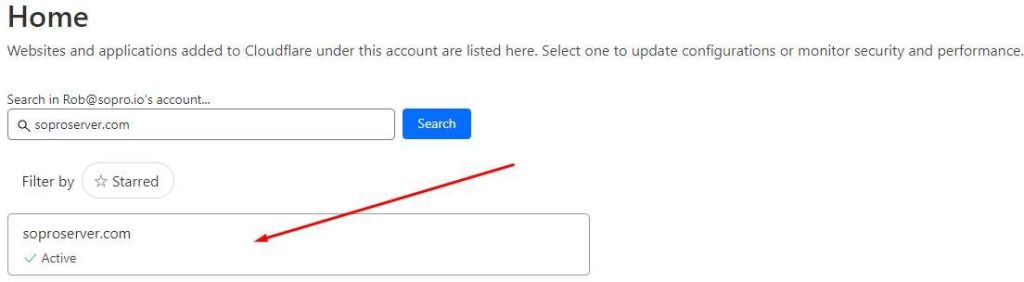
- Log into your Cloudflare account and find your domain (use the search bar if you own multiple domains), then click on it to select it:
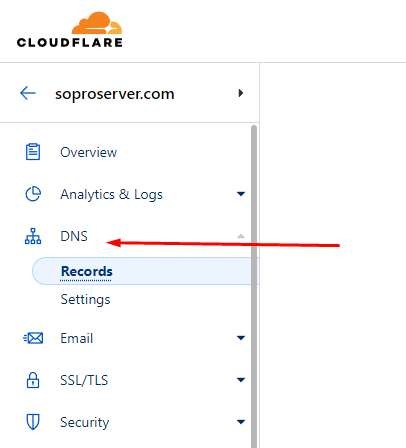
- Choose “DNS” on the left-hand side menu:
- Find the “Add record” button and click on it:

- Choose “NS” for “Type”. Fill the “Name (required)” field with the subdomain name agreed upon and the “Nameserver (required)” field with one of the ameservers sent by Sopro. When finished click the “Save” button to save the new record:
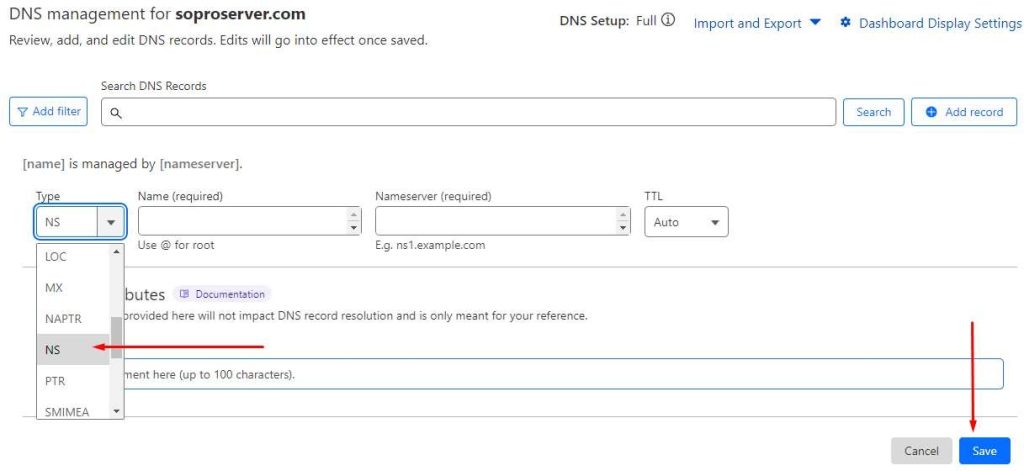
- Add all 4 records sent by Sopro by repeating the previous 2 steps:

Section 2: DNS records addition
The first step in this configuration would be to select a subdomain name which will be used for the Sopro activity.
Examples of most common used subdomains:
email.domain.com / mail.domain.com; uk/eu/us.domain.com
Once a subdomain name is selected and shared with Sopro, Sopro will generate and send over the required DNS records for the subdomain setup. These include TXT, CNAME and MX record types.
Below are examples of DNS records which are added in different domain registrars/DNS Managers.
DNS records addition
GoDaddy
- Log into your GoDaddy account and navigate to:
- Your Account -> My Products -> Domain Manager
- You can also follow this link: https://dcc.godaddy.com/
- Find your domain in the list (use the search bar if you own multiple domains) and click on the domain name itself:

Choose the DNS tab and click on “Add New Record” to add your first record:
- To add a TXT record, under “Type” choose TXT. The “Name” and “Value” fields are filled with the values sent by Sopro. All TXT records provided by Sopro need to be added, and “Save” should be clicked once finished:
- To add a CNAME record, under type choose CNAME. The “Name” and “Value” fields are filled with the values sent by Sopro. All CNAME records provided by Sopro need to be added, and “Save” should be clicked once finished:

- To add a MX record, under type choose MX. The “Name”, “Priority” and “Value” fields are filled with the values sent by Sopro. All MX records provided by Sopro need to be added, and “Save” should be clicked once finished:

- Add all records of all types provided by Sopro, save the settings and contact your Sopro account managers. The Screenshot below is just an example and should not be used as a reference:


- Depending on the subdomain configuration, an additional TXT record might be required.
Namecheap
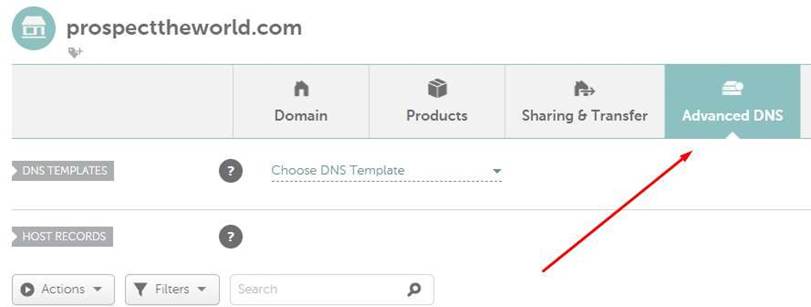
- Log into your Namecheap account and click on “Domain List” on the left-hand side. Find your domain in the list (use the search bar if you own multiple domains), and click the “Manage” button:
- Click on “Advanced DNS”:
- Scroll down and under all your DNS records find the “Add new record” button:

- To add a TXT record, under “Type” choose TXT. The “Name” and “Value” fields are filled with the values sent by Sopro. Tick the green check symbol to save the new record:

- CNAME record also has a “Name” and a “Value”:

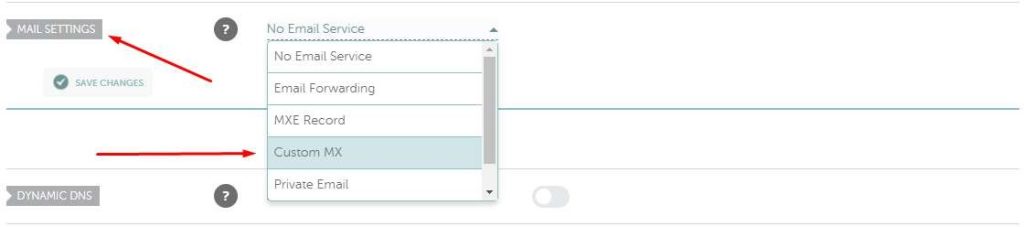
- To add a MX record, scroll down below your existing DNS records to find “Mail settings”. From the dropdown list choose “Custom MX”:
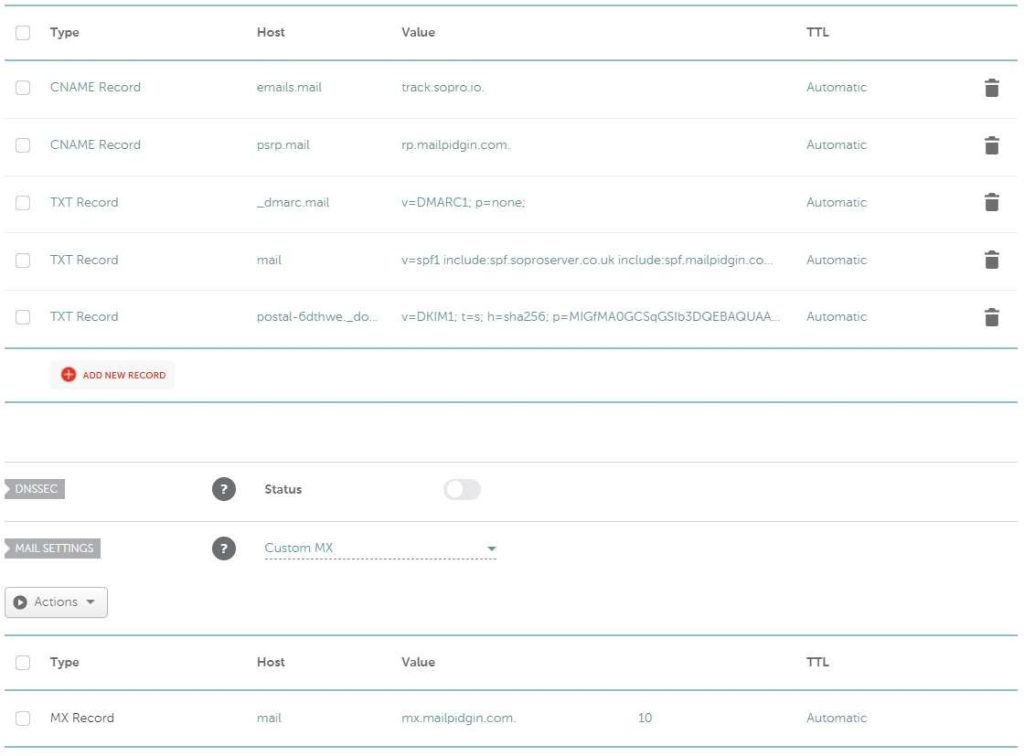
- Apart from “Host” and “Value” (which is in fact the mail server), MX records have “Priority”. To save the newly added click the “Save all changes” button

- Add all records of all types provided by Sopro, save the settings and contact your Sopro account managers. The Screenshot below is just an example and should not be used as a reference.
- Depending on the subdomain configuration, an additional TXT record might be required.
Cloudflare
- Log into your Cloudflare account and find your domain (use the search bar if you own multiple domains), then click on it to select it:
- Choose “DNS” on the left-hand side menu:
- Find the “Add record” button and click on it:
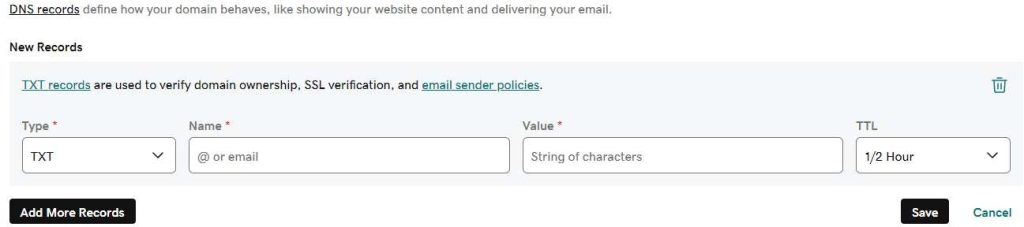
- To add a TXT record, under “Type” choose TXT. The “Name (required)” and “Content (required)” fields are filled with the values sent by Sopro. When finished click the “Save” button to save the new record:
- CNAME record has a “Name (required)” and “Target (required)” fields. Turn off the “Proxy status” toggle to show “DNS only”:

- Apart from “Name (required)” and “Mail server (required)”, MX records have “Priority”:

- Add all records of all types provided by Sopro, save the settings and contact your Sopro account managers. The Screenshot below is just an example and should not be used as a reference:

- Depending on the subdomain configuration, an additional TXT record might be required.