Salesforce CRM Integration
Synchronise your Sopro campaign with Salesforce
Purpose of the document
Sopro’s integration with Salesforce offers a simple solution to connect and synchronise your Sopro campaign data with Salesforce.
In this document we explain how to set up and activate the integration via the Sopro portal and outline the various available configurations.
The aim of the integration is to support the followingdata transmissions between Sopro and Salesforce:
- Import target Companies and associated data from Sopro to Salesforce as Accounts.
- Import target Prospects and associated data from Sopro to Salesforce as Leads or Contacts.
- Import intents from Sopro’s multi-channel activities, such as website visits, web chat sessions, redeemed gifts, leads from LinkedIn Outreach, and booked calls via phone numbers provided.
- Create Opportunities in Salesforce from Sopro campaign successful events, such as positive responses.
- Categorise and assign lead sources, lead, contact and opportunity owners, and synchronise opportunity stages.
- Sync all email communication from the Sopro campaign.
Considering which prospects to import
The integration offers two import options. You can decide which of the following options best fits your requirements:
- You can import all Sopro campaign data into Salesforce, regardless of the prospecting results. This would import all prospects in your campaign, even if they decline or don’t respond.
- You can choose the Sopro campaign data you want to import into Salesforce, based on specified intent triggers. This means you can import only contacts who responded, or positive leads.
Activating your Salesforce CRM link
Before we start, let’s get you logged in and looking at the right page:
- Login to portal: https://portal.sopro.io
- Navigate to CRM sync: https://portal.sopro.io/crm-integrations
- You’ll need your Salesforce account to open that too.
Now let’s authorise Sopro to connect with your Salesforce account and activate the service.
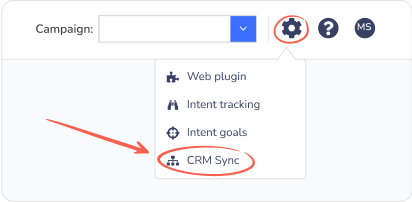
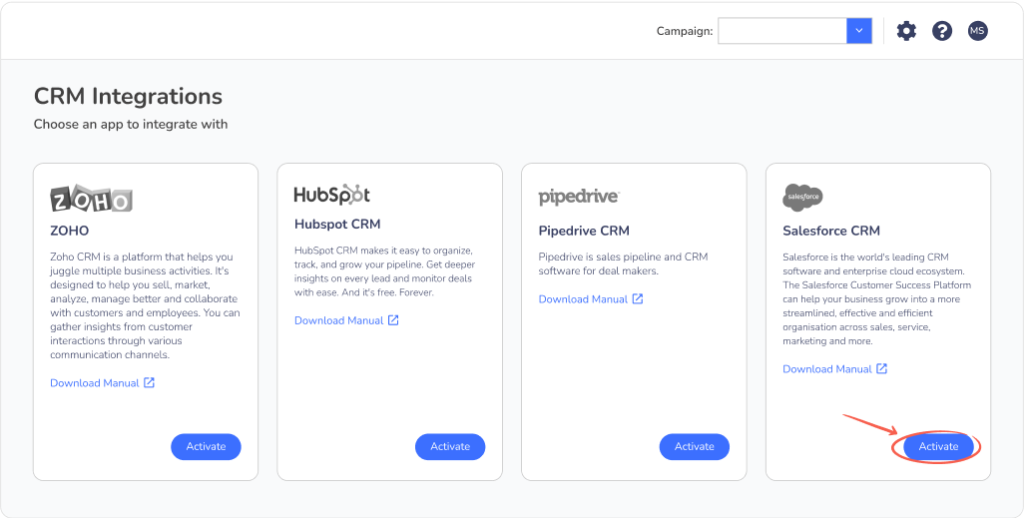
Step 1: Connecting the accounts
To start the configuration setup, click the toggle icon next to your initials in the upper right corner. Then, select CRM Sync and click Activate under Salesforce CRM.
Next, connect your Salesforce account by logging into Salesforce.
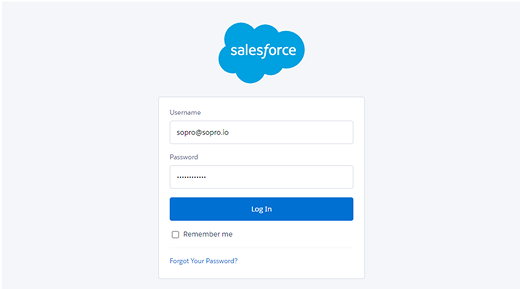
The connection between Sopro and Salesforce will be automatically authorised. You will then be redirected to the next step – General Import Settings.
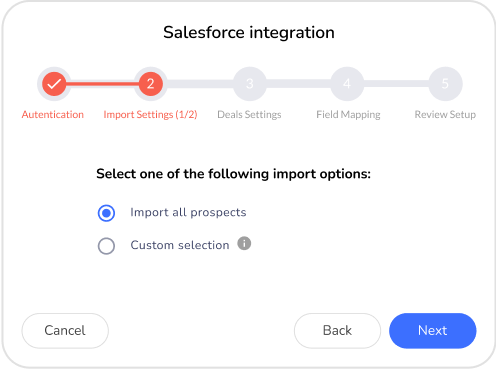
Step 2: General import settings
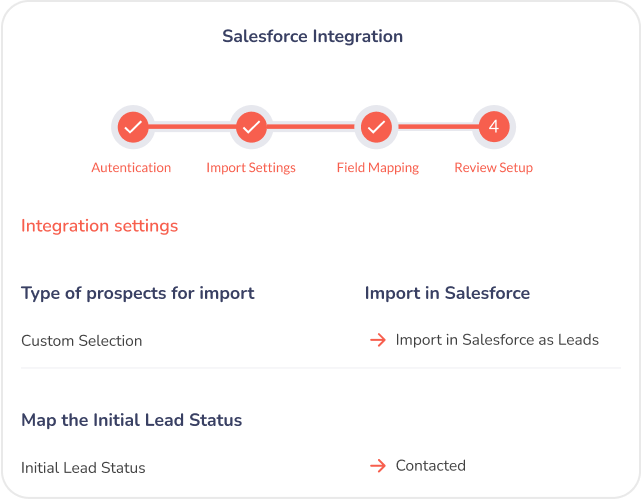
1. Import options
This step defines which prospects should be imported from your Sopro campaign to Salesforce. You have two options:
- Import all prospects
Select this option to import all prospects we contact on your behalf within your Sopro campaign.
I.e. If your Sopro campaign engages 10,000 prospects, you will see all 10,000 prospects in Salesforce.
- Custom Selection
Select this option to import prospects who have shown Intent for your product/service from your Sopro campaign. You can also customise which Intent types to be imported.
I.e. If your Sopro campaign has engaged 10,000 prospects resulting in 500 intents, you will only see the 500 intents in your Salesforce account.
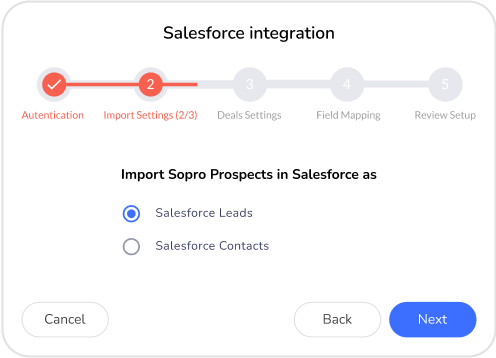
2. Import as leads or contacts
Select whether data from Sopro should be imported as Salesforce Leads or Salesforce Contacts.
Step 3: Importing and mapping responses
In the next section, you can select which types of intents to import into Salesforce and map the lead status for each type of intent from your Sopro campaign. The options available will depend on your selection in step 2.
If you selected “Import all prospects” in step 2, every prospect from your Sopro campaign will be imported to Salesforce. The integration then will update the lead status of each contact as they show intent in your Sopro campaign
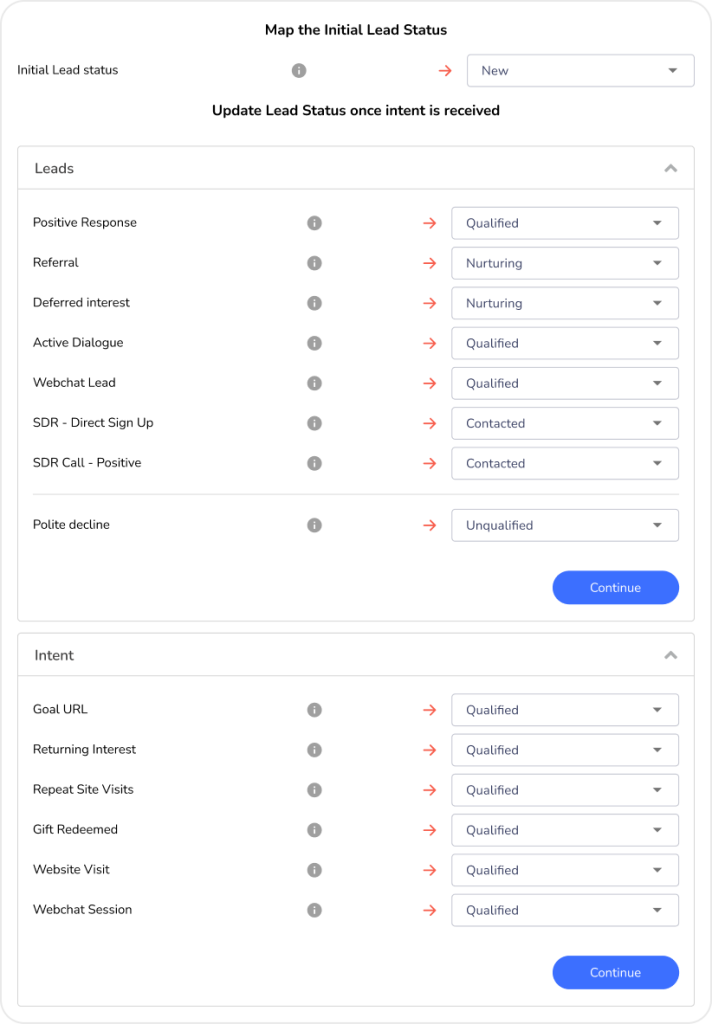
Initial lead status:
- Select the initial status for the contacted prospects (Prospects who are contacted, but still haven’t shown any intent).
Mapping Lead Status:
- Assign how the lead status should be updated for each type of response. As contacts respond to your Sopro campaign, your data will automatically update in Salesforce.
(I.e. Initial Lead Status – New;
Prospect responds positively. Lead Status updates from – New > In progress.)
Sopro recommendation
If you want to differentiate between different types of intents (such as Positive Response, Website Visitors, Webchat Sessions, Inbound Web Forms, etc.), you can map specific lead statuses in Salesforce. By adjusting the “Lead Status” field, you can categorise and track engagement types like intents and responses more effectively.
The following customisation will allow you to manage and analyse your leads more clearly, without needing to create new fields, by simply mapping your lead statuses to different engagement types.
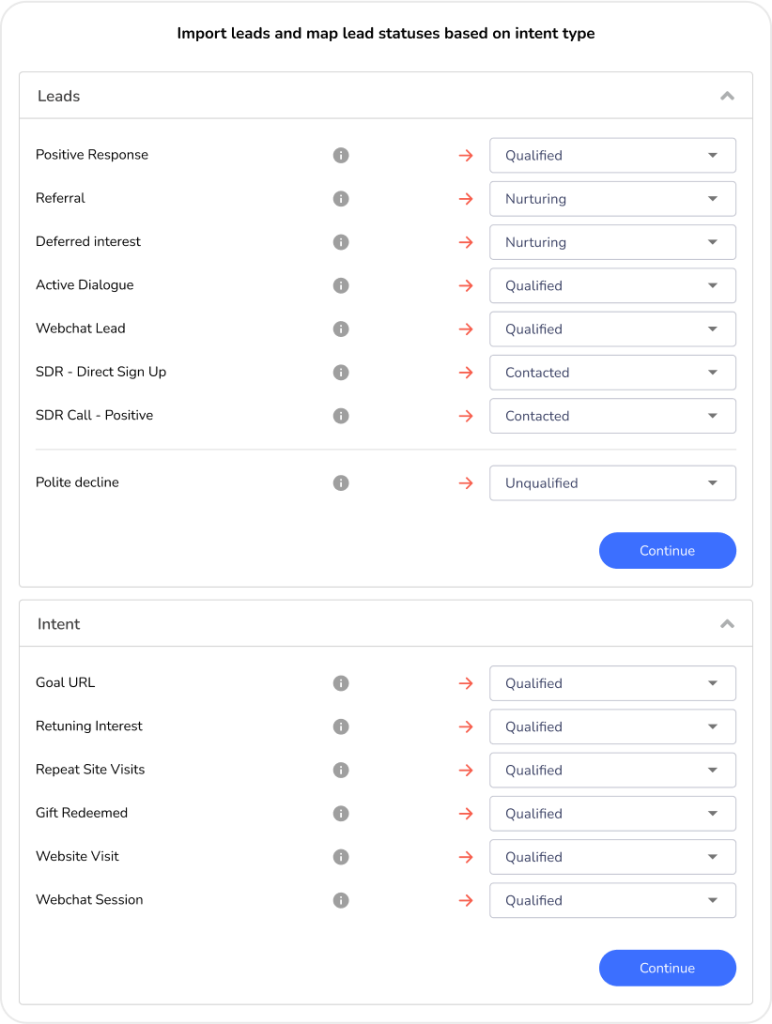
If the “Custom Selection” option was selected in the previous step, you have the option to select which types of intent to be imported as Contacts and to map each of the intent types with a certain lead status.
(I.e Positive Response > In progress – This will import all positive responses as Contacts and will assign them with an “In progress” lead status.)
Sopro recommendation
If you want to differentiate between different types of intents (such as Positive Response, Website Visitors, Webchat Sessions, Inbound Web Forms, etc.), you can map specific lead statuses in Salesforce. By adjusting the “Lead Status” field, you can categorise and track engagement types like intents and responses more effectively.
The following customisation will allow you to manage and analyse your leads more clearly, without needing to create new fields, by simply mapping your lead statuses to different engagement types.
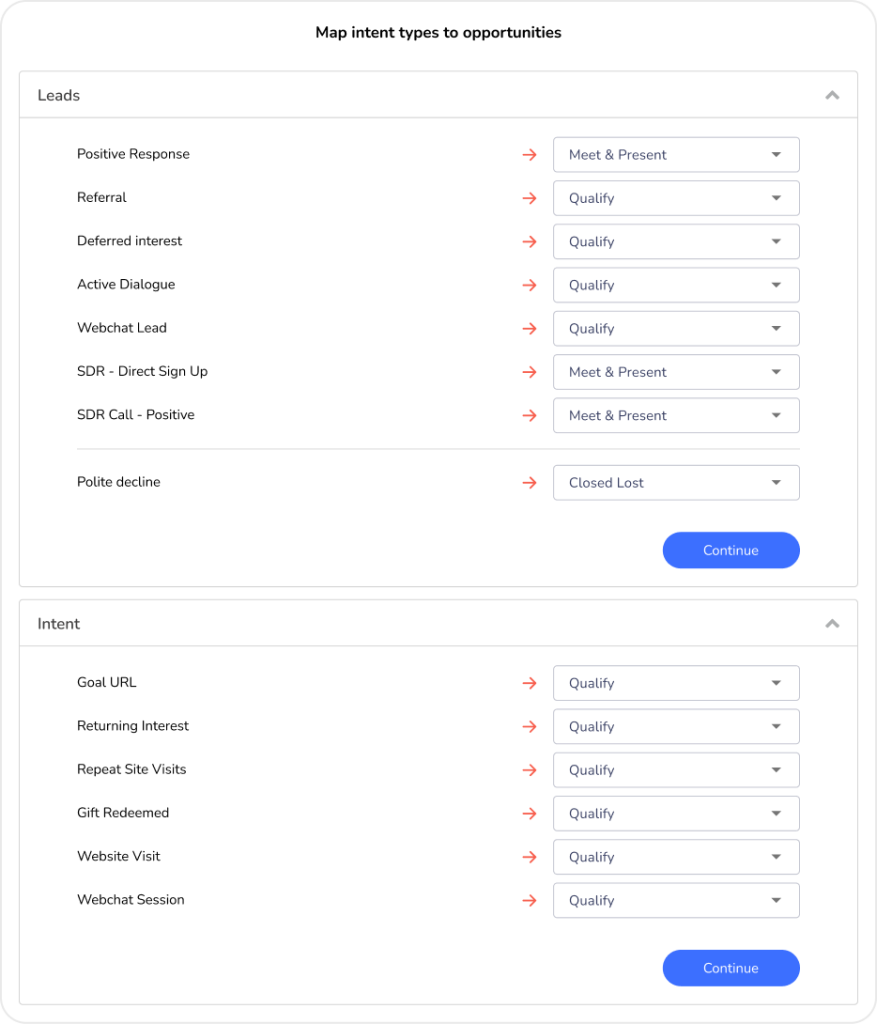
Step 4: Create deals for imported contacts from Sopro to Salesforce
This is an optional step. If selected, it allows you to create opportunities and assign them to specific opportunity stages based on the type of response in your Sopro campaign. (Only available if Contacts are imported).
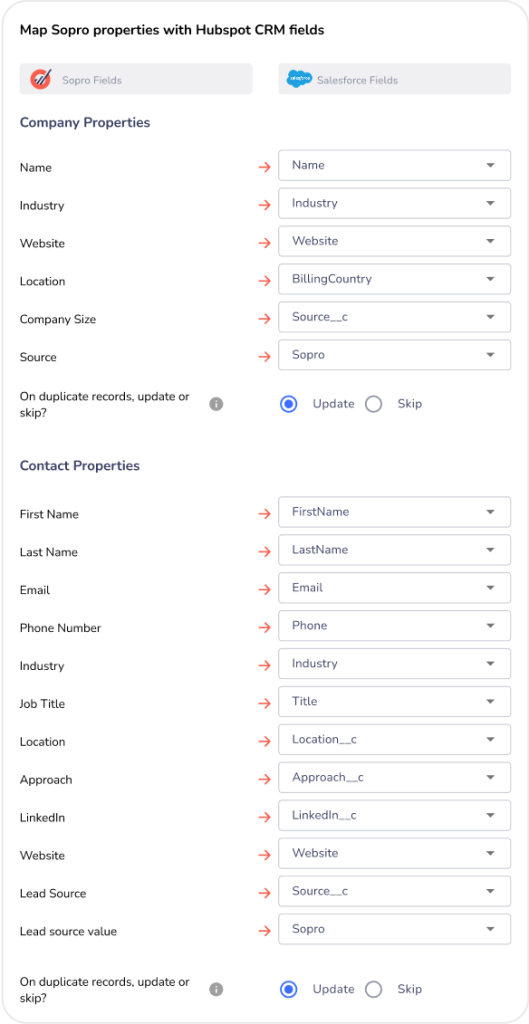
Step 5: Map Sopro properties with Salesforce CRM fields
The next step is to map the Company, Contact/ Lead and Opportunities properties from your Sopro campaign to the corresponding fields in Salesforce. Some of the fields will already be prepopulated with default selections.
Sopro recommendation
The source field enables bigger visibility to track the marketing channel where a specific contact/deal originates from. Adding a custom value “Sopro” to your Source list will mark all the prospects imported from your Sopro campaign accordingly.
“On duplicate records, update or skip?” – This option enables updating existing
company or contact information in your Salesforce with the details from the Sopro campaign.
Step 6: Review settings and confirm.
Once you have completed the settings and field mapping stages, you can review the setup and click
Confirm to activate the Salesforce integration.
Step 7: Bask in glory
You blocked out an hour for this and we’re guessing it took between 3 and 5 minutes to complete.
Worst case, you have at least 45 minutes back to revel in your triumph over technology. We recommend either a deck chair or a sun lounger for this stage,usually in good company andwith an assortment of appropriate beverages.